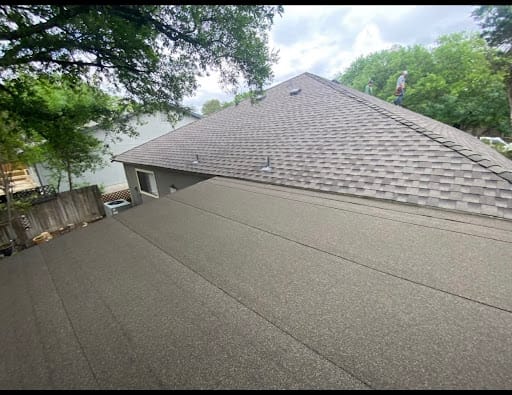
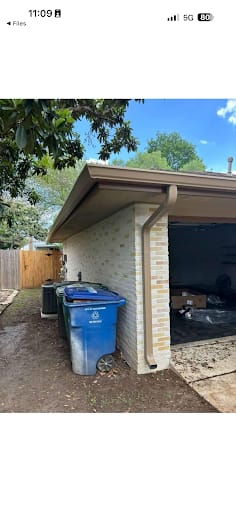
Emergency Roof Tarping in San Antonio, TX
Protect your home with BH Roofing's emergency roof tarping in San Antonio. Homeowners across the area count on our crew to respond fast after a storm and secure the roof before more water gets in.
When to Install Roof Tarping

Immediate Storm Damage:
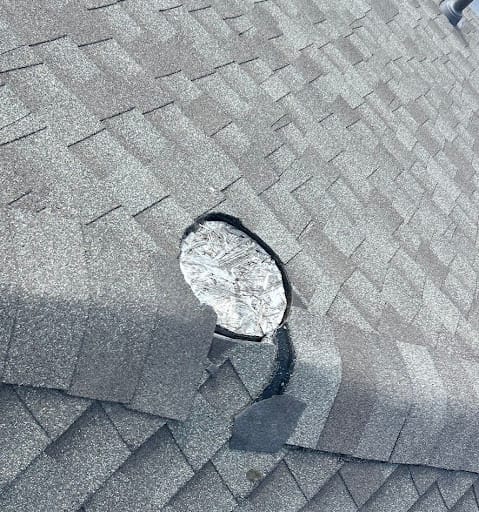
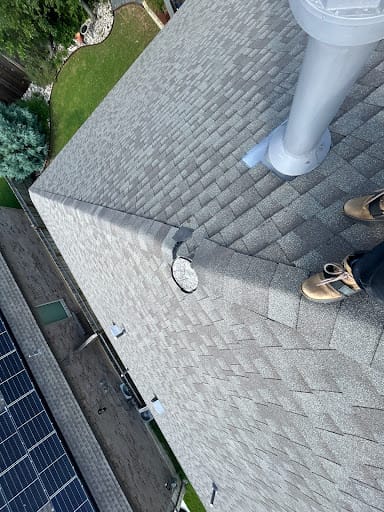
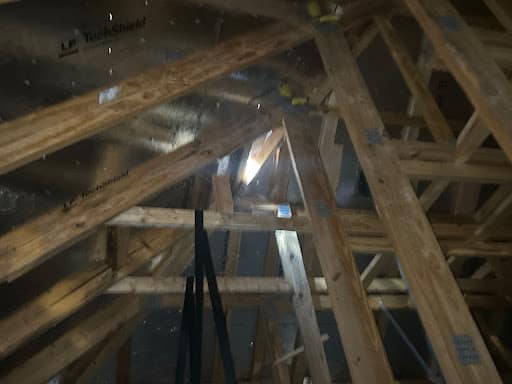
After a severe storm, check your roof for leaks, missing shingles, lifted flashing, or structural damage. If you notice any issues, a roof tarp is the fastest way to prevent further water intrusion and protect your home until repairs can be made.
Before Insurance Inspections:
Getting a tarp up quickly after a storm stops extra damage that a later inspection might not cover. It also shows you took action right away to protect your home, which helps support your insurance claim.
During Ongoing Repairs:
If repairs can’t be completed right away, tarping keeps your home protected while you wait for materials, scheduling, or insurance approvals. This temporary protection prevents worsening damage and buys time until permanent repairs are done.
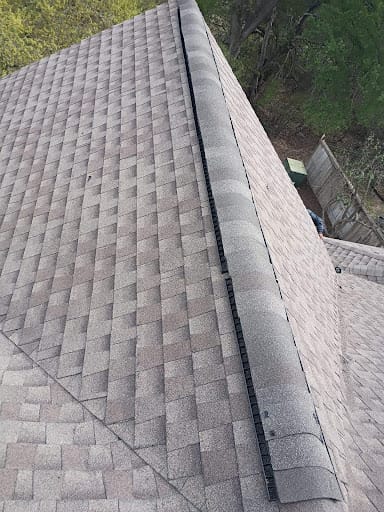
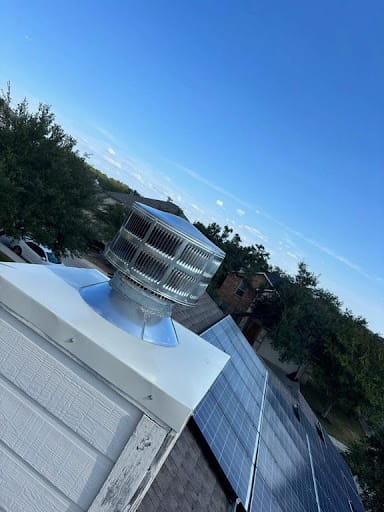
Why Install Roof Tarping?
Emergency roof tarping creates a strong barrier against wind, rain, and debris, preventing further roof and interior damage. It helps maintain your home’s structural integrity, reduces the risk of leaks and mold growth, and protects your belongings from water intrusion. Tarping is a cost-effective temporary solution that saves you money by stopping damage from spreading. BH Roofing responds quickly with durable, professionally installed tarps so you can have peace of mind after a storm. Contact us today for fast, reliable emergency roof tarping in San Antonio and nearby areas.
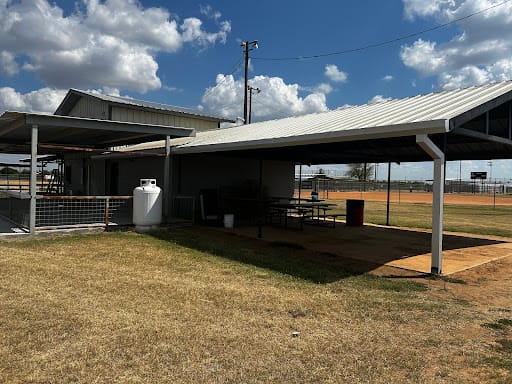
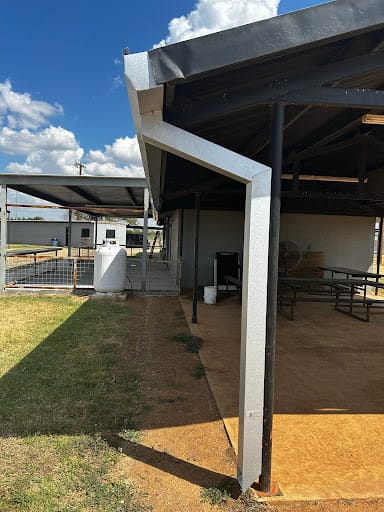
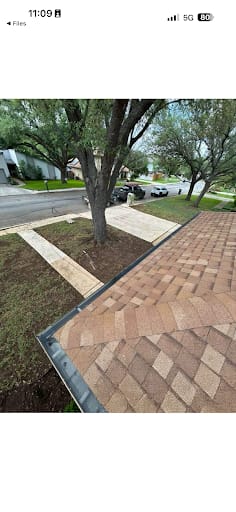
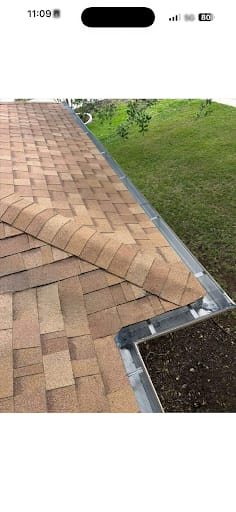
Our RECENTLY FINISHED PROJECTS
testimonials
Our Happy customers
Thank you very much for the good work and the great price.
read moreread less


×
Thank you very much for the good work and the great price.
Tech was great at explaining what was wrong and what needed to be done to solve it. Then the gutter installation guy was quick, did a great job.
read moreread less

×
Tech was great at explaining what was wrong and what needed to be done to solve it. Then the gutter installation guy was quick, did a great job.
Had a full roof replacement in April with BH ... 5 stars start to finish. Post install I noted some concerns with the patio cover rolled roofing portion of the job and they quickly addressed the concern and returned promptly. We had the roof done to help the home sell quickly, and the home buyers inspector noted a few very minor issues with the install and again BH came back out and made those updates. Andrea in the office and Matt in the field were great, but Andrea is the star. Very good with communication and follow through. Highly recommend.
read moreread less

×
Had a full roof replacement in April with BH ... 5 stars start to finish. Post install I noted some concerns with the patio cover rolled roofing portion of the job and they quickly addressed the concern and returned promptly. We had the roof done to help the home sell quickly, and the home buyers inspector noted a few very minor issues with the install and again BH came back out and made those updates. Andrea in the office and Matt in the field were great, but Andrea is the star. Very good with communication and follow through. Highly recommend.
6/22/26 Update - Once again I highly recommend BH Roofing. We had them come out again to investigate potential roof damage. Bobby and Matthew were incredibly responsive from the start and quickly came out to inspect an issue with our roof. What really set them apart was the thoroughness of their inspection and documentation. They provided detailed photos, videos, and a comprehensive report that clearly identified the problem and its cause.Their documentation was so well done that we were able to present it to our original home builder, who ultimately accepted responsibility and paid for the repairs and resulting damages.Bobby and Matthew were professional, knowledgeable, and great communicators throughout the entire process. If you need an honest roofing company that stands behind its work and provides exceptional service, BH Roofing is the company to call.Bobby and BH Roofing are truly the best. They completed our roof faster than expected in one day with better than expected quality. Will definitely use them every time in the future and recommend to all my family and friends.
read moreread less

×
6/22/26 Update - Once again I highly recommend BH Roofing. We had them come out again to investigate potential roof damage. Bobby and Matthew were incredibly responsive from the start and quickly came out to inspect an issue with our roof. What really set them apart was the thoroughness of their inspection and documentation. They provided detailed photos, videos, and a comprehensive report that clearly identified the problem and its cause.Their documentation was so well done that we were able to present it to our original home builder, who ultimately accepted responsibility and paid for the repairs and resulting damages.Bobby and Matthew were professional, knowledgeable, and great communicators throughout the entire process. If you need an honest roofing company that stands behind its work and provides exceptional service, BH Roofing is the company to call.Bobby and BH Roofing are truly the best. They completed our roof faster than expected in one day with better than expected quality. Will definitely use them every time in the future and recommend to all my family and friends.
The roof came out amazing Andy and Andrea are very helpful! I would totally recommend. They are awsome. Will call them if any needed
read moreread less

×
The roof came out amazing Andy and Andrea are very helpful! I would totally recommend. They are awsome. Will call them if any needed
Matt was very professional and knowledgeable about the issue when he came to house. He gave an honest solution to the problem.
read moreread less

×
Matt was very professional and knowledgeable about the issue when he came to house. He gave an honest solution to the problem.
As a new homeowner, I had never dealt with a roof leak before, so I was relieved to find BH Roofing. Andy inspected the roof and surrounding area, provided photos, and clearly explained the repairs needed. He was honest and transparent throughout the process, completed the work quickly, and even warranted the repair. I’m very grateful to have found a trustworthy and reliable company.
read moreread less

×
As a new homeowner, I had never dealt with a roof leak before, so I was relieved to find BH Roofing. Andy inspected the roof and surrounding area, provided photos, and clearly explained the repairs needed. He was honest and transparent throughout the process, completed the work quickly, and even warranted the repair. I’m very grateful to have found a trustworthy and reliable company.
I had a roof leak. I called knowing the rain was moving in. They had a representative out the next day. He walked the roof gave me great details and gave his recommendation on how to fix the problem. The crew was out 2 hours later and finished all in same day. Very pleased and to this point after 3 heavy rains no more leaks. Great experience all around.Thank you BH Roofing!John Guffey
read moreread less

×
I had a roof leak. I called knowing the rain was moving in. They had a representative out the next day. He walked the roof gave me great details and gave his recommendation on how to fix the problem. The crew was out 2 hours later and finished all in same day. Very pleased and to this point after 3 heavy rains no more leaks. Great experience all around.Thank you BH Roofing!John Guffey
Matt was very professional and explained to us in great detail what the issues were with our roof. He provided photos of areas that needed repair.Photos were taken during the repair process and of the finished product. The area was left very clean.
read moreread less

×
Matt was very professional and explained to us in great detail what the issues were with our roof. He provided photos of areas that needed repair.Photos were taken during the repair process and of the finished product. The area was left very clean.
Checked my mom’s roof said she just needed a few things patched.. took care of the leak … thank you!
read moreread less

×
Checked my mom’s roof said she just needed a few things patched.. took care of the leak … thank you!
Matt Puente came by and did a great job at providing a thorough assessment of my roof and also provided a service to take care of some issues.
read moreread less

×
Matt Puente came by and did a great job at providing a thorough assessment of my roof and also provided a service to take care of some issues.
Great service and very friendly sales staff. Great communication and fixed the problem quickly
read moreread less

×
Great service and very friendly sales staff. Great communication and fixed the problem quickly
I had an excellent experience with BH Roofing. Hera was polite, professional, and very helpful when scheduling my free roof inspection appointment. Andy arrived on time, completed a thorough inspection, and provided a detailed report of his findings. He was courteous, knowledgeable, and took the time to explain everything clearly. I highly recommend BH Roofing and will absolutely use them again for any future roofing or gutter needs.
read moreread less

×
I had an excellent experience with BH Roofing. Hera was polite, professional, and very helpful when scheduling my free roof inspection appointment. Andy arrived on time, completed a thorough inspection, and provided a detailed report of his findings. He was courteous, knowledgeable, and took the time to explain everything clearly. I highly recommend BH Roofing and will absolutely use them again for any future roofing or gutter needs.
Alex came out and let me know that he didn't think it was my roof giving me issues. I appreciate them not trying to get money from me unnecessarily.
read moreread less

×
Alex came out and let me know that he didn't think it was my roof giving me issues. I appreciate them not trying to get money from me unnecessarily.
I had a leak and I called BH Roofing to come out and look at either fixing the issue or get a new roof to replace my old roof. Alex came out and walked me thru both options for repair and getting a new roof. He was knowledgeable and there was no pressure at all. I went with getting a repair and was very satisfied with the speed and quality of the work. Alex came out during the repair to make sure things went smooth and kept me updated.The process was so easy I went with getting a new roof afterwards cause I knew it was needed and the repair was only to hold me over till I could get a new roof. After discussing my options on what I wanted/needed I was scheduled and the install was on the scheduled date without issue. Looks amazing, would highly recommend for a stress roofing services. It was so stress free I even asked to get gutters installed, which was on my list of things to get eventually, but it was just easier to have them do it as well.
read moreread less

×
I had a leak and I called BH Roofing to come out and look at either fixing the issue or get a new roof to replace my old roof. Alex came out and walked me thru both options for repair and getting a new roof. He was knowledgeable and there was no pressure at all. I went with getting a repair and was very satisfied with the speed and quality of the work. Alex came out during the repair to make sure things went smooth and kept me updated.The process was so easy I went with getting a new roof afterwards cause I knew it was needed and the repair was only to hold me over till I could get a new roof. After discussing my options on what I wanted/needed I was scheduled and the install was on the scheduled date without issue. Looks amazing, would highly recommend for a stress roofing services. It was so stress free I even asked to get gutters installed, which was on my list of things to get eventually, but it was just easier to have them do it as well.
Had a great experience with BH roofing! Will definitely use for future issues. They responded quickly and were very professional. Had a leak that Andy came out to inspect, and he was able to come back same day to repair issue. Prices were reasonable. I highly recommend them.
read moreread less

×
Had a great experience with BH roofing! Will definitely use for future issues. They responded quickly and were very professional. Had a leak that Andy came out to inspect, and he was able to come back same day to repair issue. Prices were reasonable. I highly recommend them.
Very pleased with BH Roofing. I was in a bit of a hurry to have my roof replaced and Matthew helped coordinate with the owner Bobby to get me in quick! They started about 7:15am (brought us coffee too) and finished before 4pm! They even got rid of a large snake in my yard they found!Highly recommend!!
read moreread less

×
Very pleased with BH Roofing. I was in a bit of a hurry to have my roof replaced and Matthew helped coordinate with the owner Bobby to get me in quick! They started about 7:15am (brought us coffee too) and finished before 4pm! They even got rid of a large snake in my yard they found!Highly recommend!!
BH Roofing was fantastic to work with. Their response time was quick, they showed up exactly when they said they would, and their attention to detail really stood out. From start to finish, the customer care was excellent. I’d highly recommend them to anyone needing reliable, professional roofing work.
read moreread less

×
BH Roofing was fantastic to work with. Their response time was quick, they showed up exactly when they said they would, and their attention to detail really stood out. From start to finish, the customer care was excellent. I’d highly recommend them to anyone needing reliable, professional roofing work.
Thank you for the repair.
read moreread less

×
Thank you for the repair.
BH Roofing provided great work at a great price. Would definitely recommend.
read moreread less

×
BH Roofing provided great work at a great price. Would definitely recommend.
Couldn’t have asked for better service from a roofing company. From start to finish the project seamless and easy. 10 out of 10! They hit the ball out of the park literally!
read moreread less

×
Couldn’t have asked for better service from a roofing company. From start to finish the project seamless and easy. 10 out of 10! They hit the ball out of the park literally!
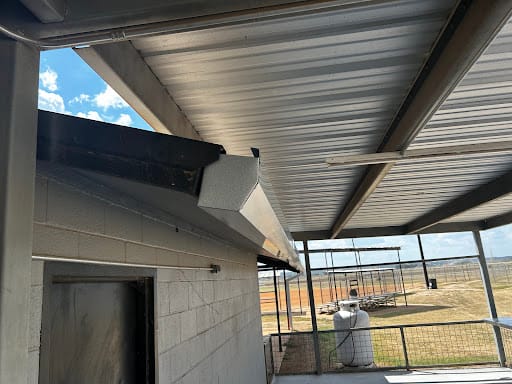
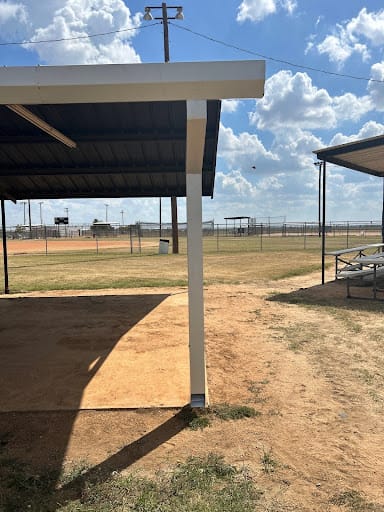
Thank you BH roofing for the excellent work that you provided at our local softball/baseball fields! Highly recommend!!!
read moreread less

×
Thank you BH roofing for the excellent work that you provided at our local softball/baseball fields! Highly recommend!!!
Super happy with the work BH Roofing did at MVYBA! The gutters and improvements look great, and everything was smooth from start to finish. Pricing was great and the team was professional and efficient. Definitely recommend!
read moreread less

×
Super happy with the work BH Roofing did at MVYBA! The gutters and improvements look great, and everything was smooth from start to finish. Pricing was great and the team was professional and efficient. Definitely recommend!
Awesome staff!! Very professional.
read moreread less

×
Awesome staff!! Very professional.
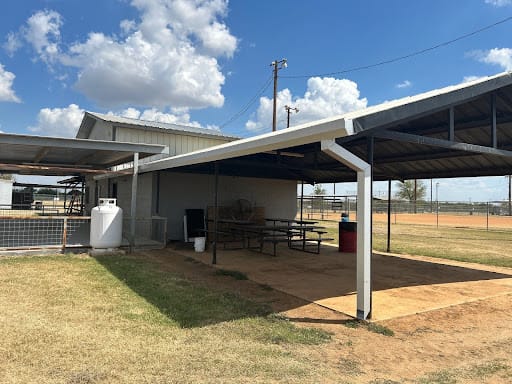
BH Roofing did an outstanding job at the MVYBA fields! The price was reasonable and they got it done efficiently! Highly recommend!
read moreread less

×
BH Roofing did an outstanding job at the MVYBA fields! The price was reasonable and they got it done efficiently! Highly recommend!
Great work! Fast, friendly, and a great price!
read moreread less

×
Great work! Fast, friendly, and a great price!
We hired BH Roofing for gutter installation and facility upgrades at our ball fields, and they exceeded expectations. The crew was professional, on time, and communicated clearly throughout the entire project. The new gutters have made a big difference in drainage, and the overall upgrades really improved the look and functionality of the fields. They paid attention to detail and left everything clean when the job was done. Would absolutely use them again and highly recommend to others.
read moreread less

×
We hired BH Roofing for gutter installation and facility upgrades at our ball fields, and they exceeded expectations. The crew was professional, on time, and communicated clearly throughout the entire project. The new gutters have made a big difference in drainage, and the overall upgrades really improved the look and functionality of the fields. They paid attention to detail and left everything clean when the job was done. Would absolutely use them again and highly recommend to others.
BH Roofing did top notch work on the facility improvements at our local baseball fields! Highly recommend!
read moreread less

×
BH Roofing did top notch work on the facility improvements at our local baseball fields! Highly recommend!
Fantastic job on the gutters at the castroville baseball fields!
read moreread less

×
Fantastic job on the gutters at the castroville baseball fields!
BH Roofing just recently installed our gutter system on our house. The guy who came to give us the quote was super friendly and transparent with everything from pricing and design. The day of the actually work happened within a week and the two guys who came out did an excellent and efficient job as well. One thing I really liked was how near they were. They broke down all their boxes they used and put them away and left no trash behind. The gutters came out great and very happy that we went with these guys. Definitely would recommend.
read moreread less

×
BH Roofing just recently installed our gutter system on our house. The guy who came to give us the quote was super friendly and transparent with everything from pricing and design. The day of the actually work happened within a week and the two guys who came out did an excellent and efficient job as well. One thing I really liked was how near they were. They broke down all their boxes they used and put them away and left no trash behind. The gutters came out great and very happy that we went with these guys. Definitely would recommend.
Matt Puente and the team at BH Roofing provided an excellent service from start to finish. Matt was outstanding!!! he made sure we understood the entire process of replacing our roof completely. He explained every step with patience and clarity, answering all our questions and keeping us informed throughout.The crew was professional, efficient, and very careful with our property. The final result is a high-quality new roof that looks great and gives us peace of mind.We highly recommend BH Roofing and Matt Puente. 5 stars!!!!
read moreread less

×
Matt Puente and the team at BH Roofing provided an excellent service from start to finish. Matt was outstanding!!! he made sure we understood the entire process of replacing our roof completely. He explained every step with patience and clarity, answering all our questions and keeping us informed throughout.The crew was professional, efficient, and very careful with our property. The final result is a high-quality new roof that looks great and gives us peace of mind.We highly recommend BH Roofing and Matt Puente. 5 stars!!!!
Matthew did a great job! Came on time with short notice and really took care of us. Highly recommend for any roof repair.
read moreread less

×
Matthew did a great job! Came on time with short notice and really took care of us. Highly recommend for any roof repair.
High quality, fast service and kind employees! Def recommend them!
read moreread less

×
High quality, fast service and kind employees! Def recommend them!
Great to work with! And they work your insurance. Making it hassle free 🙂
read moreread less

×
Great to work with! And they work your insurance. Making it hassle free 🙂
Great service, great quality of work and very professional. Would absolutely recommend them.
read moreread less

×
Great service, great quality of work and very professional. Would absolutely recommend them.
Great, helpful staff that doesn’t condescend. The coffee on the first day of service was a nice touch, too.
read moreread less

×
Great, helpful staff that doesn’t condescend. The coffee on the first day of service was a nice touch, too.
Came across these guys from reddit. Alex contacted me right away, Extremely helpfully and no judgment living in a older home. They gave me a fair price and was willing to work with my finance.
read moreread less

×
Came across these guys from reddit. Alex contacted me right away, Extremely helpfully and no judgment living in a older home. They gave me a fair price and was willing to work with my finance.
I was really impressed with these guys… from call to quote to repaired was two business days and the quality of work is top notch!! It’s also a better price that I was quoted by a “friend ” in the business!Will use again, though hopefully I don’t need it for a WHILE!
read moreread less

×
I was really impressed with these guys… from call to quote to repaired was two business days and the quality of work is top notch!! It’s also a better price that I was quoted by a “friend ” in the business!Will use again, though hopefully I don’t need it for a WHILE!
Big shout out to BH Roofing for the outstanding Job on the work preformed at the Medina Valley Youth Baseball Fields! The new metal gutters installed look great. Thanks you BH Roofing!
read moreread less

×
Big shout out to BH Roofing for the outstanding Job on the work preformed at the Medina Valley Youth Baseball Fields! The new metal gutters installed look great. Thanks you BH Roofing!
They did a great job painting the facilities at the MVYBA complex. Would hire them again for sure.
read moreread less

×
They did a great job painting the facilities at the MVYBA complex. Would hire them again for sure.
Roofers did a great job. Arrived on time and completed all the repairs in one day. They also cleaned up and collected nails.
read moreread less

×
Roofers did a great job. Arrived on time and completed all the repairs in one day. They also cleaned up and collected nails.
Bobby and his crew did a great job diagnosing and fixing our roof leak. If you need roof work this is an honest group to work with.
read moreread less

×
Bobby and his crew did a great job diagnosing and fixing our roof leak. If you need roof work this is an honest group to work with.
I really appreciated and thank you for the good work . The roof came out very nice and I will recommend you to other peoples 👍😀
read moreread less

×
I really appreciated and thank you for the good work . The roof came out very nice and I will recommend you to other peoples 👍😀
Did an awesome job on our youth baseball complex!
read moreread less

×
Did an awesome job on our youth baseball complex!
Matthew came to my home today and was prompt, courteous, and extremely knowledgeable. I really appreciated his thoroughness. I literally just reached out to them last night via the website and they came today. Stellar service!
read moreread less

×
Matthew came to my home today and was prompt, courteous, and extremely knowledgeable. I really appreciated his thoroughness. I literally just reached out to them last night via the website and they came today. Stellar service!
BH Roofing is a great company, Starting with the office staff, and Matthew . Very professional from the top to every employee. Everyone did a great job and always had something to do.. Very organized and experienced. Great team , Very kind and respectful. Great service from beginning to end, reasonable prices. Will highly recommend.
read moreread less

×
BH Roofing is a great company, Starting with the office staff, and Matthew . Very professional from the top to every employee. Everyone did a great job and always had something to do.. Very organized and experienced. Great team , Very kind and respectful. Great service from beginning to end, reasonable prices. Will highly recommend.
Quality work from quality people.
read moreread less

×
Quality work from quality people.
I had two leaks in my roof and reached out to BH Roofing for help. I worked with Matthew during the inspection, and he quickly identified the issue as a poor shingle and sealant job. Due to a miscommunication, only one of the leaks was initially fixed—but once the company became aware of it, they responded quickly and corrected the mistake without hesitation. Their professionalism, accountability, and commitment to making things right really stood out. I appreciate their honesty and prompt follow-up, and I would recommend BH Roofing to anyone needing reliable roofing work.
read moreread less

×
I had two leaks in my roof and reached out to BH Roofing for help. I worked with Matthew during the inspection, and he quickly identified the issue as a poor shingle and sealant job. Due to a miscommunication, only one of the leaks was initially fixed—but once the company became aware of it, they responded quickly and corrected the mistake without hesitation. Their professionalism, accountability, and commitment to making things right really stood out. I appreciate their honesty and prompt follow-up, and I would recommend BH Roofing to anyone needing reliable roofing work.
Had BH Roofing out again and was really happy with the work. Matt was easy to work with, showed up on time, and explained everything along the way. The job was done well and the whole process was hassle-free. Definitely recommend BH Roofing if you want solid, reliable work.
read moreread less

×
Had BH Roofing out again and was really happy with the work. Matt was easy to work with, showed up on time, and explained everything along the way. The job was done well and the whole process was hassle-free. Definitely recommend BH Roofing if you want solid, reliable work.
BH Roofing is amazing. I reached out to them to inspect my roof before putting my home on the market and they did the repairs. Then I hired BH Roofing as a third party inspector for the roof of the home I was purchasing. Thanks to Matt’s expertise, I got an entire new roof for the purchase of my new because it had been improperly installed despite it being a new build. They are top knotch and I strongly recommend using them for all your roofing needs.
read moreread less

×
BH Roofing is amazing. I reached out to them to inspect my roof before putting my home on the market and they did the repairs. Then I hired BH Roofing as a third party inspector for the roof of the home I was purchasing. Thanks to Matt’s expertise, I got an entire new roof for the purchase of my new because it had been improperly installed despite it being a new build. They are top knotch and I strongly recommend using them for all your roofing needs.
BH roofing replaced my roof several years back and I have had no issues. I truly appreciate the high quality of work and professionalism by BH roofing.
read moreread less

×
BH roofing replaced my roof several years back and I have had no issues. I truly appreciate the high quality of work and professionalism by BH roofing.
I used BH Roofing to replace/install gutters on my home. They were very easy to work with, from the initial estimate to installation. The result is meeting my expectations.
read moreread less

×
I used BH Roofing to replace/install gutters on my home. They were very easy to work with, from the initial estimate to installation. The result is meeting my expectations.
We recently worked with BH Roofing, a San Antonio roofing and gutter company, to fabricate and install commercial gutters at our sports complex, and the results were outstanding! The gutters performed better than expected during the heavy rains on October 25, showing the high quality and craftsmanship of their work. From start to finish, Andrea Munoz and the BH Roofing team provided excellent communication, professionalism, and customer service. It’s clear they take pride in what they do. We were so impressed that we plan to use them again soon for the rest of our gutter installation needs. If you’re looking for a reliable roofing contractor in San Antonio who delivers top-quality results, BH Roofing is the team to call! — MVYBA
read moreread less

×
We recently worked with BH Roofing, a San Antonio roofing and gutter company, to fabricate and install commercial gutters at our sports complex, and the results were outstanding! The gutters performed better than expected during the heavy rains on October 25, showing the high quality and craftsmanship of their work. From start to finish, Andrea Munoz and the BH Roofing team provided excellent communication, professionalism, and customer service. It’s clear they take pride in what they do. We were so impressed that we plan to use them again soon for the rest of our gutter installation needs. If you’re looking for a reliable roofing contractor in San Antonio who delivers top-quality results, BH Roofing is the team to call! — MVYBA
Everything was great from being a roofing I had been waiting on my chimney to get done and Andrea took the time out to call the insurance to make sure they got all that pictures and then they approve chimney repair as soon as they got the car from her they called me and let me know they were going to take care of it then she made another call letting him know it wasn't going to be enough money to repair it and they took care of it that second too Andrea really goes beyond and takes care of everybody that needs help I sure do appreciate Andrea she's the best helper I got from this company thank you for all the work Andrea does and keep her and don't let her go she really made my day
read moreread less

×
Everything was great from being a roofing I had been waiting on my chimney to get done and Andrea took the time out to call the insurance to make sure they got all that pictures and then they approve chimney repair as soon as they got the car from her they called me and let me know they were going to take care of it then she made another call letting him know it wasn't going to be enough money to repair it and they took care of it that second too Andrea really goes beyond and takes care of everybody that needs help I sure do appreciate Andrea she's the best helper I got from this company thank you for all the work Andrea does and keep her and don't let her go she really made my day
I called BH Roofing and spoke with Andrea, who was incredibly helpful and professional. Less than 12 hours later, someone was already at my home to assess the damage and tarp my roof! The quick response and excellent service really stood out. When it comes time for my roof repair or replacement, BH Roofing will be my first and only choice. Highly recommend!
read moreread less

×
I called BH Roofing and spoke with Andrea, who was incredibly helpful and professional. Less than 12 hours later, someone was already at my home to assess the damage and tarp my roof! The quick response and excellent service really stood out. When it comes time for my roof repair or replacement, BH Roofing will be my first and only choice. Highly recommend!
Reached out for a quote and Matt was very thorough and made sure that I would get everything needed, in case the insurance adjuster missed some things. They helped me with communicating with my insurance to get approval of additional things needed. The owner Bobby was involved and very helpful. The crews came out and did a great job and they ensured to clean up after. There was communication after everything was completed. There was one location forgotten by the gutter installers and when I reached out to Matt he got them to come back and get it done. I even had a couple questions after the install was complete and they have always answered and helped me. I highly recommend this company if you need roofing and gutter replacement.
read moreread less

×
Reached out for a quote and Matt was very thorough and made sure that I would get everything needed, in case the insurance adjuster missed some things. They helped me with communicating with my insurance to get approval of additional things needed. The owner Bobby was involved and very helpful. The crews came out and did a great job and they ensured to clean up after. There was communication after everything was completed. There was one location forgotten by the gutter installers and when I reached out to Matt he got them to come back and get it done. I even had a couple questions after the install was complete and they have always answered and helped me. I highly recommend this company if you need roofing and gutter replacement.
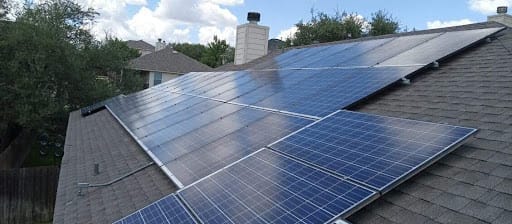
We had a great experience with BH Roofing! Dealing with the insurance claim was totally seamless—they literally handled everything. The roof replacement was completed right on time, and they were very professional and respectful of our tenant during the process. We were especially impressed that they used excellent, certified electricians to manage the solar panel removal and reinstallation. Highly recommend this trustworthy team!
read moreread less

×
We had a great experience with BH Roofing! Dealing with the insurance claim was totally seamless—they literally handled everything. The roof replacement was completed right on time, and they were very professional and respectful of our tenant during the process. We were especially impressed that they used excellent, certified electricians to manage the solar panel removal and reinstallation. Highly recommend this trustworthy team!
BH Roofing is amazing. Matthew Puente has inspected 2 roofs for me and his knowledge has saved us lots of money and headaches. Keep up the great work!
read moreread less
×
BH Roofing is amazing. Matthew Puente has inspected 2 roofs for me and his knowledge has saved us lots of money and headaches. Keep up the great work!
You’ll believe a Superhero can do roofs! Their logo lines up with the level of service and flexibility they provide. Had hail damage and everything from the communication, follow-up, scheduling, and speed of work was exemplary. Fair pricing, good partners, and overall ease of service makes me highly recommend them!
read moreread less

×
You’ll believe a Superhero can do roofs! Their logo lines up with the level of service and flexibility they provide. Had hail damage and everything from the communication, follow-up, scheduling, and speed of work was exemplary. Fair pricing, good partners, and overall ease of service makes me highly recommend them!
I had a great experience with BH Roofing. Matt was professional, and easy to work with. He showed up on time and explained everything clearly. I’m really happy with the service and the quality of their work. Definitely recommend if you’re looking for reliable, honest, and skilled roofers!
read moreread less
×
I had a great experience with BH Roofing. Matt was professional, and easy to work with. He showed up on time and explained everything clearly. I’m really happy with the service and the quality of their work. Definitely recommend if you’re looking for reliable, honest, and skilled roofers!
BH Roofing is the best!!! Recently contacted them for a gutter install. Rapid response all around on call back, estimate scheduling, and install! Quality results that perfectly blend into my home. I highly recommend BH Roofing for your roofing and gutter needs. Call BH Roofing!!!
read moreread less

×
BH Roofing is the best!!! Recently contacted them for a gutter install. Rapid response all around on call back, estimate scheduling, and install! Quality results that perfectly blend into my home. I highly recommend BH Roofing for your roofing and gutter needs. Call BH Roofing!!!
We kept finding attic insulation in our yard. Had the pest control company come look who confirmed it was a critter who’d opened up the roof. Reached out to BH Roofing and they were able to come check it shortly after. Due to the gaping hole in our roof, they acted quickly and came out a few days later to repair. I’d definitely use them again, although hopefully not for more critters!
read moreread less

×
We kept finding attic insulation in our yard. Had the pest control company come look who confirmed it was a critter who’d opened up the roof. Reached out to BH Roofing and they were able to come check it shortly after. Due to the gaping hole in our roof, they acted quickly and came out a few days later to repair. I’d definitely use them again, although hopefully not for more critters!
I had an excellent experience with BH Roofing! From the first call to the final inspection, they were professional, responsive, and honest. The team arrived on time, explained everything clearly, and completed the roof repairs efficiently. The quality of work is top-notch — no shortcuts, no mess left behind, and everything looks great. I truly appreciate their attention to detail and the pride they take in their work. Highly recommend them to anyone needing roof repairs or maintenance!
read moreread less

×
I had an excellent experience with BH Roofing! From the first call to the final inspection, they were professional, responsive, and honest. The team arrived on time, explained everything clearly, and completed the roof repairs efficiently. The quality of work is top-notch — no shortcuts, no mess left behind, and everything looks great. I truly appreciate their attention to detail and the pride they take in their work. Highly recommend them to anyone needing roof repairs or maintenance!
BH roofing has helped many of my clients that hired me as their public adjuster. I have never once heard anything but positive feedback! I recommend BH Roofing to anyone looking for quality work and great customer service!
read moreread less

×
BH roofing has helped many of my clients that hired me as their public adjuster. I have never once heard anything but positive feedback! I recommend BH Roofing to anyone looking for quality work and great customer service!
Matthew was extremely confident and clear with his explanation and documentation of the problems with our roof issues. He gave us several realistic options to consider before we make a decision. He was extremely gracious and courteous during his visit. We know which direction to go now. We recommend Mathew with BH Roofing. He was punctual with the appointment time and kept us informed if there was a problem.
read moreread less

×
Matthew was extremely confident and clear with his explanation and documentation of the problems with our roof issues. He gave us several realistic options to consider before we make a decision. He was extremely gracious and courteous during his visit. We know which direction to go now. We recommend Mathew with BH Roofing. He was punctual with the appointment time and kept us informed if there was a problem.
Bobby and his team did a great job. My roof had some damage from high winds. I went through insurance and BH Roofing helped me out with the process and were happy to meet with the adjuster. It was a great process and the new roof looks really nice.
read moreread less

×
Bobby and his team did a great job. My roof had some damage from high winds. I went through insurance and BH Roofing helped me out with the process and were happy to meet with the adjuster. It was a great process and the new roof looks really nice.
BH Roofing did excellent work on my home. They did both a new roof and gutters. Once scheduled, which was only about a week from the order. The roof was completed in just one day, and the gutters were installed shortly after on their own scheduled day. The crews were professional, efficient, and made sure everything was done right. Cleanup was thorough, including a magnet sweep to catch any nails, which my dogs really appreciated. From start to finish, the service and quality were outstanding.
read moreread less

×
BH Roofing did excellent work on my home. They did both a new roof and gutters. Once scheduled, which was only about a week from the order. The roof was completed in just one day, and the gutters were installed shortly after on their own scheduled day. The crews were professional, efficient, and made sure everything was done right. Cleanup was thorough, including a magnet sweep to catch any nails, which my dogs really appreciated. From start to finish, the service and quality were outstanding.
BH Roofing was recommended by a co-worker and I was happy with their services from day 1. Matt was very helpful and went into detail with the repairs and suggestions needed on my home. After completion, Bobby went over some other helpful information that would help protect my investment, thank you and your team and I look forward to more business in the future!
read moreread less

×
BH Roofing was recommended by a co-worker and I was happy with their services from day 1. Matt was very helpful and went into detail with the repairs and suggestions needed on my home. After completion, Bobby went over some other helpful information that would help protect my investment, thank you and your team and I look forward to more business in the future!
Incredible communication and admin effort before the work was done. Communicated on my behalf with insurance for over 12 weeks to get the full scope of the damage repaired and recovered and that was before I had paid a dime. The team was friendly, completed an entire roof replacement in a single day, and did a really incredible job cleaning up the job site and all of the scraps around the house before leaving. Very glad I didn't chose a storm-chasing company, would recommend BH to anyone.
read moreread less

×
Incredible communication and admin effort before the work was done. Communicated on my behalf with insurance for over 12 weeks to get the full scope of the damage repaired and recovered and that was before I had paid a dime. The team was friendly, completed an entire roof replacement in a single day, and did a really incredible job cleaning up the job site and all of the scraps around the house before leaving. Very glad I didn't chose a storm-chasing company, would recommend BH to anyone.
Fantastic crew and project leaders. Communication was on point throughout the entire process. They worked well with my insurance to get my roof claim done efficiently and quickly. 10/10 all around.
read moreread less

×
Fantastic crew and project leaders. Communication was on point throughout the entire process. They worked well with my insurance to get my roof claim done efficiently and quickly. 10/10 all around.
We had an outstanding experience with BH Roofing! From the very beginning, Matt Puente, the coordinator, went above and beyond—visiting multiple times and even getting up on the roof before, during, and after the installation to ensure everything was done right. His attention to detail and consistent updates kept us fully informed every step of the way. What truly set this experience apart was the incredible customer care shown by the owner, Bobby Hernandez. On the day of the install, he personally stopped by with Starbucks—after asking for our drink preferences ahead of time! That thoughtful gesture was just the beginning. Bobby also gave us great tips on how to protect our cat, who has severe anxiety. Thanks to his advice, we were able to create a safe and quiet space for our pet during the loud parts of the job. At the end of the day, Bobby returned to inspect the worksite, ensuring everything was clean and even walking the perimeter himself to pick up any stray nails. Matt came by the next day to take pictures and to make sure that everything was to our satisfaction. Their professionalism, time management, and teamwork were all top-notch. We’re incredibly grateful for their care and quality work. Highly recommend BH Roofing for anyone looking for a trustworthy, detail-oriented, and genuinely caring roofing company!
read moreread less

×
We had an outstanding experience with BH Roofing! From the very beginning, Matt Puente, the coordinator, went above and beyond—visiting multiple times and even getting up on the roof before, during, and after the installation to ensure everything was done right. His attention to detail and consistent updates kept us fully informed every step of the way. What truly set this experience apart was the incredible customer care shown by the owner, Bobby Hernandez. On the day of the install, he personally stopped by with Starbucks—after asking for our drink preferences ahead of time! That thoughtful gesture was just the beginning. Bobby also gave us great tips on how to protect our cat, who has severe anxiety. Thanks to his advice, we were able to create a safe and quiet space for our pet during the loud parts of the job. At the end of the day, Bobby returned to inspect the worksite, ensuring everything was clean and even walking the perimeter himself to pick up any stray nails. Matt came by the next day to take pictures and to make sure that everything was to our satisfaction. Their professionalism, time management, and teamwork were all top-notch. We’re incredibly grateful for their care and quality work. Highly recommend BH Roofing for anyone looking for a trustworthy, detail-oriented, and genuinely caring roofing company!
Buying a new roof is incredibly stressful, especially after a storm. I’ve had bad experiences with contractors in the past, and I don’t know much about roofing, so I was really nervous going into this. After meeting with SEVERAL companies, Bobby from BH Roofing stood out immediately. He didn’t talk at me he took the time to really explain what was going on with my roof, breaking down the vulnerable areas and why they mattered. I never felt talked down to or confused. He was professional, informative, and kind. On the day of the job, I met Daniel, the job site lead, and he walked me through the day’s process, answered all my questions, and even brought my favorite coffee. That level of care meant so much! The whole team made a stressful situation feel manageable and smooth, and I felt supported the entire time. Thank you Bobby and Daniel for making this process so much easier than I expected. Highly recommend BH Roofing!
read moreread less

×
Buying a new roof is incredibly stressful, especially after a storm. I’ve had bad experiences with contractors in the past, and I don’t know much about roofing, so I was really nervous going into this. After meeting with SEVERAL companies, Bobby from BH Roofing stood out immediately. He didn’t talk at me he took the time to really explain what was going on with my roof, breaking down the vulnerable areas and why they mattered. I never felt talked down to or confused. He was professional, informative, and kind. On the day of the job, I met Daniel, the job site lead, and he walked me through the day’s process, answered all my questions, and even brought my favorite coffee. That level of care meant so much! The whole team made a stressful situation feel manageable and smooth, and I felt supported the entire time. Thank you Bobby and Daniel for making this process so much easier than I expected. Highly recommend BH Roofing!
Matt and his team quickly responded to my damaged roof vent problem. Matt was courteous and demonstrated knowledge of my problem. They did a Great job replacing my damaged roof vents.
read moreread less

×
Matt and his team quickly responded to my damaged roof vent problem. Matt was courteous and demonstrated knowledge of my problem. They did a Great job replacing my damaged roof vents.
B&H Roofing did an amazing job. They had great communication & did excellent work. Very timely responses & no issues with the install. I would recommend to anyone looking to do work. Getting drone pictures of the install was such a pleasant surprise. Matt was wonderful to work with throughout the process.
read moreread less

×
B&H Roofing did an amazing job. They had great communication & did excellent work. Very timely responses & no issues with the install. I would recommend to anyone looking to do work. Getting drone pictures of the install was such a pleasant surprise. Matt was wonderful to work with throughout the process.
Quick, professional, and great communication! We will choose them again in the future.
read moreread less

×
Quick, professional, and great communication! We will choose them again in the future.
Bobby was great. Gave an in depth look at our gutters and explained potential issues. Very knowledgeable and great customer service
read moreread less

×
Bobby was great. Gave an in depth look at our gutters and explained potential issues. Very knowledgeable and great customer service
We needed an emergency roof tarping after our roof sprung a leak into our living room from weeks of heavy rainfall. Matthew showed up within a day of our request and completed the tarping quickly and thoroughly. Looking forward to finishing up the rest of our repairs with him and the BH team soon!
read moreread less

×
We needed an emergency roof tarping after our roof sprung a leak into our living room from weeks of heavy rainfall. Matthew showed up within a day of our request and completed the tarping quickly and thoroughly. Looking forward to finishing up the rest of our repairs with him and the BH team soon!
BH Roofing is a wonderful company to work with. Matthew gave us an estimate before leaving our home, that wasn’t the case with the other companies we called. They made us feel like our business was important. The crew did an outstanding job and the clean up was equally great. If we need roofing services again, we know who to call.
read moreread less

×
BH Roofing is a wonderful company to work with. Matthew gave us an estimate before leaving our home, that wasn’t the case with the other companies we called. They made us feel like our business was important. The crew did an outstanding job and the clean up was equally great. If we need roofing services again, we know who to call.
I highly recommend BH roofing. They came out same day in just a few hours to figure out a leak. The technician Matthew was able to tarp off the area right away and will be back in a few days to inspect and fix everything. Thank you BH Roofing.
read moreread less

×
I highly recommend BH roofing. They came out same day in just a few hours to figure out a leak. The technician Matthew was able to tarp off the area right away and will be back in a few days to inspect and fix everything. Thank you BH Roofing.
The work that was done on my roof was excellent. I appreciate how careful they were covering my plants and the way they did clean up after on my yard. Sam and Matt and team worked very hard. They were awesome to deal with. I would recommend them to anyone.
read moreread less

×
The work that was done on my roof was excellent. I appreciate how careful they were covering my plants and the way they did clean up after on my yard. Sam and Matt and team worked very hard. They were awesome to deal with. I would recommend them to anyone.